Photos on Canvas & Photos on Wood – More Wall Decor Ideas
Start with Photo Wall Collage…
A photo wall collage using photos on canvas, family wall art, photos on wood and mixing it up with a whole lot of wall decor ideas, can create a stunning wall gallery. Depending on your home or apartment, you can create a photo wall over your bed, in the entry, a hallway, kitchen, bathroom, stairwell, boring corner or even on a console, if you can’t bear holes in the wall.

Source: Pottery Barn
These photo gallery wall ideas will help you personalize the gallery wall and bring in some color; its easier to create a wall gallery with a yellow focus than to paint your wall yellow.

Source: House of Smiths
And if you don’t like it – you can change it, with the seasons, celebrations or decorating trends. There are some DIY photo gallery tutorial for creating canvas and wood photos below as well as how to position your photos, so you create a balanced, unified look.
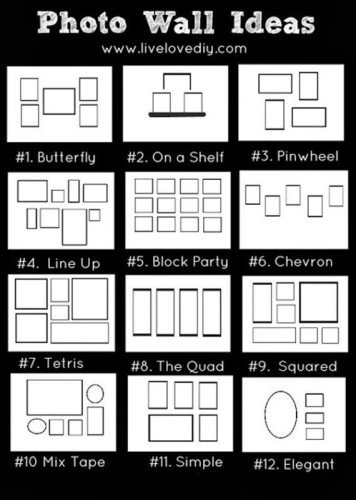
Photo Gallery Wall Ideas
The first place to start is by collecting photographs and artwork that you would like to group together. This might takes days or weeks to assemble. Once you have your photo wall ideas together place them on the floor to see how they might look together, how large a space you need and whether you need to change, add to or rearrange some pieces.

Source: Finding Home Online
Wall Decorating Ideas
Your next focus is to bring all your items together; so together they look like a unified piece of wall decor.
You can do this by using the same photo frame sizes, using the same photo frames, using the same color photo frames or printing your photos so they look similar; black and white, vintage, rustic etc.

Source: Mochatini
Your photo frames don’t have to be the same size or color, white frames and warm wood frames or black and white frames look perfect together. Getting the balance right, so they look like they belong together, just takes a bit of playing around.
Here are some great tips to creating your focal wall gallery if it is going over a sofa or bed.

Source: Emily Cox
- your piece or pieces should be at least two-thirds of the length of your bed or sofa.
- two or three pieces of art – so they work like one piece. They have the same color palette and are the same size.
- make sure you have color balance – if you have blue in one corner, try to get some blue in the opposite corner for some balance.
- use lots of different sizes of art; some vertical or horizontal and even tiny pieces up towards the ceiling, so you fill the entire wall.
Photo collage frames come in sets and in different sizes, so creating a decorating theme should not be too difficult.
Its right about now, that you need to work out a budget for your galley wall. If you have your frames, canvas and all the wall trinkets you need then the project won’t cost too much, but if you decide that you want a particular look, where the photo frames must match or you need to buy some extra pieces to fill the space, it could cost you more than you think; especially if you are arranging a photographer to take photos with a specific theme or mood.

Source: Pinterest
Printing online is less expensive than you think; its the photo shoot and additional frames where the costs begin to escalate.
Less expensive ways to make your existing photo frames work is to paint them one color or create your photo wall as a shape; square or rectangle, filling your shape with similar pieces to the edge.
A current trend is to fill an entire wall with your pieces, making it look like one large art piece. It can look quite spectacular, especially if you can’t afford gorgeous art right now.
Wall Items That Are Not Photos

Source: Pottery Barn
To add some texture and interest to your gallery wall, use mirrors, wall decals, fabric, clocks, plates and letters in different sizes. Add a ledge; it not only adds something different but is a great way of changing things around without creating more holes in the wall.

Source: Craft Work In Mommy
Here is something you can make; glitter antlers and a chevron canvas. It’s fun, inexpensive and perfect if you are looking for something larger and contemporary for a bigger wall space.
Photo Frame Sizes
Make sure, if you are buying additional frames, that you have the measurements of the wall with you, so you don’t buy the wrong size, shape or too many frames! This also helps if you are using mixed media on a focal wall.
Hanging Gallery Wall Frames
You don’t need too many tools to hang your family wall photos – there’s a video below if you don’t want your pieces to move.. at all!
- level
- hammer
- painters tape
- picture hangers and nails
- measuring tape and
- pencil
Gather all your framed pieces and other pieces, mixing scale and medium to create a wonderfully textured piece. Mark the dimensions on the floor or table with masking tape. Use one major piece – photo or art, as you focal or grounding piece. This piece is often placed in the middle of your gallery for a symmetrical look, but it often can look more interesting and far sexier if placed off center.

Source: Kylydia
If you would prefer to see them on the wall, and not the floor, create paper cut outs of each item, using craft paper or newspaper. Use painters tape to stick them to the wall, so you don’t remove any paint.

Source: Pinterest
This helps you move the pieces around the wall, without creating holes in your wall, and giving your the exact design and shape of your wall gallery.
Build around your main piece either symmetrically, if pieces are a similar size and shape, or until your shape filled and looks balanced and unified. When you are happy, its time to move these pieces to the wall. Mark the center point of the wall, starting from this point, hang your pieces to recreate your grid.
There is nothing worse than gallery wall frames that move and are crooked! This video shows how your photo collage frames will never move again!
DIY – Photos on Canvas
If you are looking for an inexpensive way to get your own photos to canvas, then the video below shows you how you can transfer images onto canvas within minutes and have your photo canvas prints ready in 4 hours. This photo on canvas technique uses a laser printer for your photos.
This way you can update your photo wall often as your family, travels or life changes.
The video below shows a similar result, using a slightly different technique from ink jet printed images.
How To Transfer Photos to Wood
Wood photo transfers are not as difficult as you might think, and using some of the techniques above, you can create family prints on wood that are good enough to give as gifts. If you love a more rustic look then the video below is perfect!
You can change the look of your wood photo transfer by changing your finishing varnish; glossy or antique and so many others ‘flavors’ to go with your existing wall decor.
Console Gallery
You can easily create a gorgeous look on your console using some of the wall decor ideas above. Consoles make it easy to move things around, update and recreate, incorporating candle holders, bowls and larger pieces that just won’t fit on your walls.
Begin by placing your larger wall art against the wall, adding smaller pieces in front of it, then adding smaller textured pieces, like moss balls or candle holders, then balance it off by adding one or two pieces to the wall.
However you like to create your photo gallery, there are so many great ideas, there is definitely one that will suit you. I’m thinking of putting together a complete set of gallery styles – so stay tune or join our list to make sure you get them.