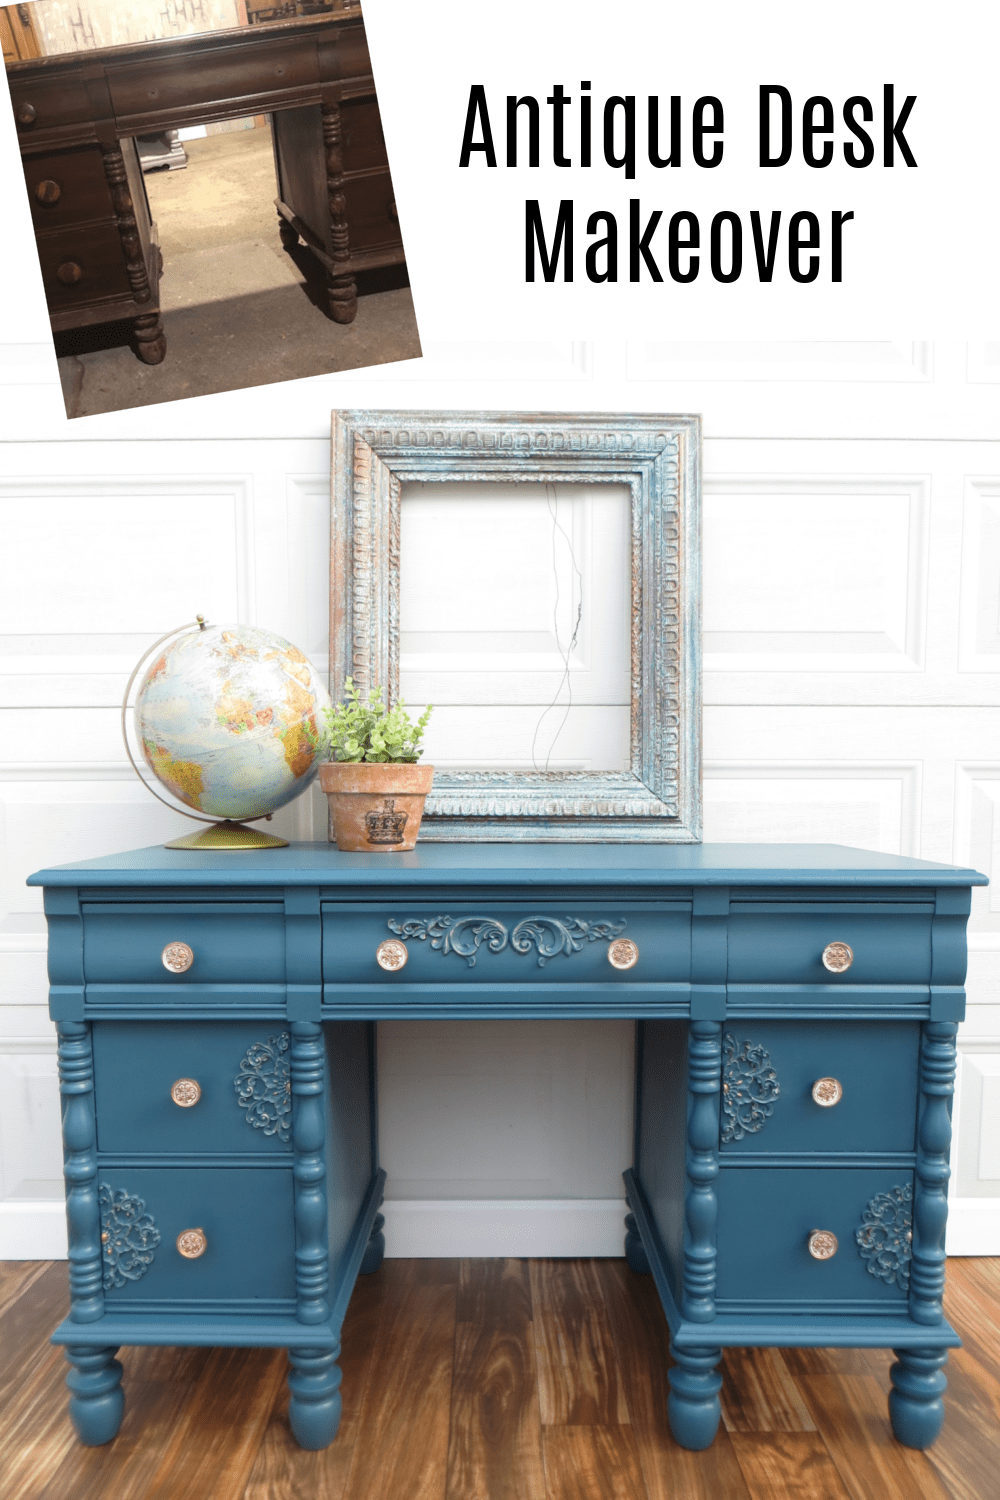
How to Chalk Paint a Desk (Antique Desk Makeover)

I’m Shannon with Wise Little Owl Furniture, and I’m so happy to share this project with you on Decorated Life today!
When I got my first apartment I had the best landlord. He let me paint the floors, the walls, and even the bathroom countertop!
That’s when I realized the power of paint to make my surroundings fit my decorating style for minimal money and without a ton of skill and experience.
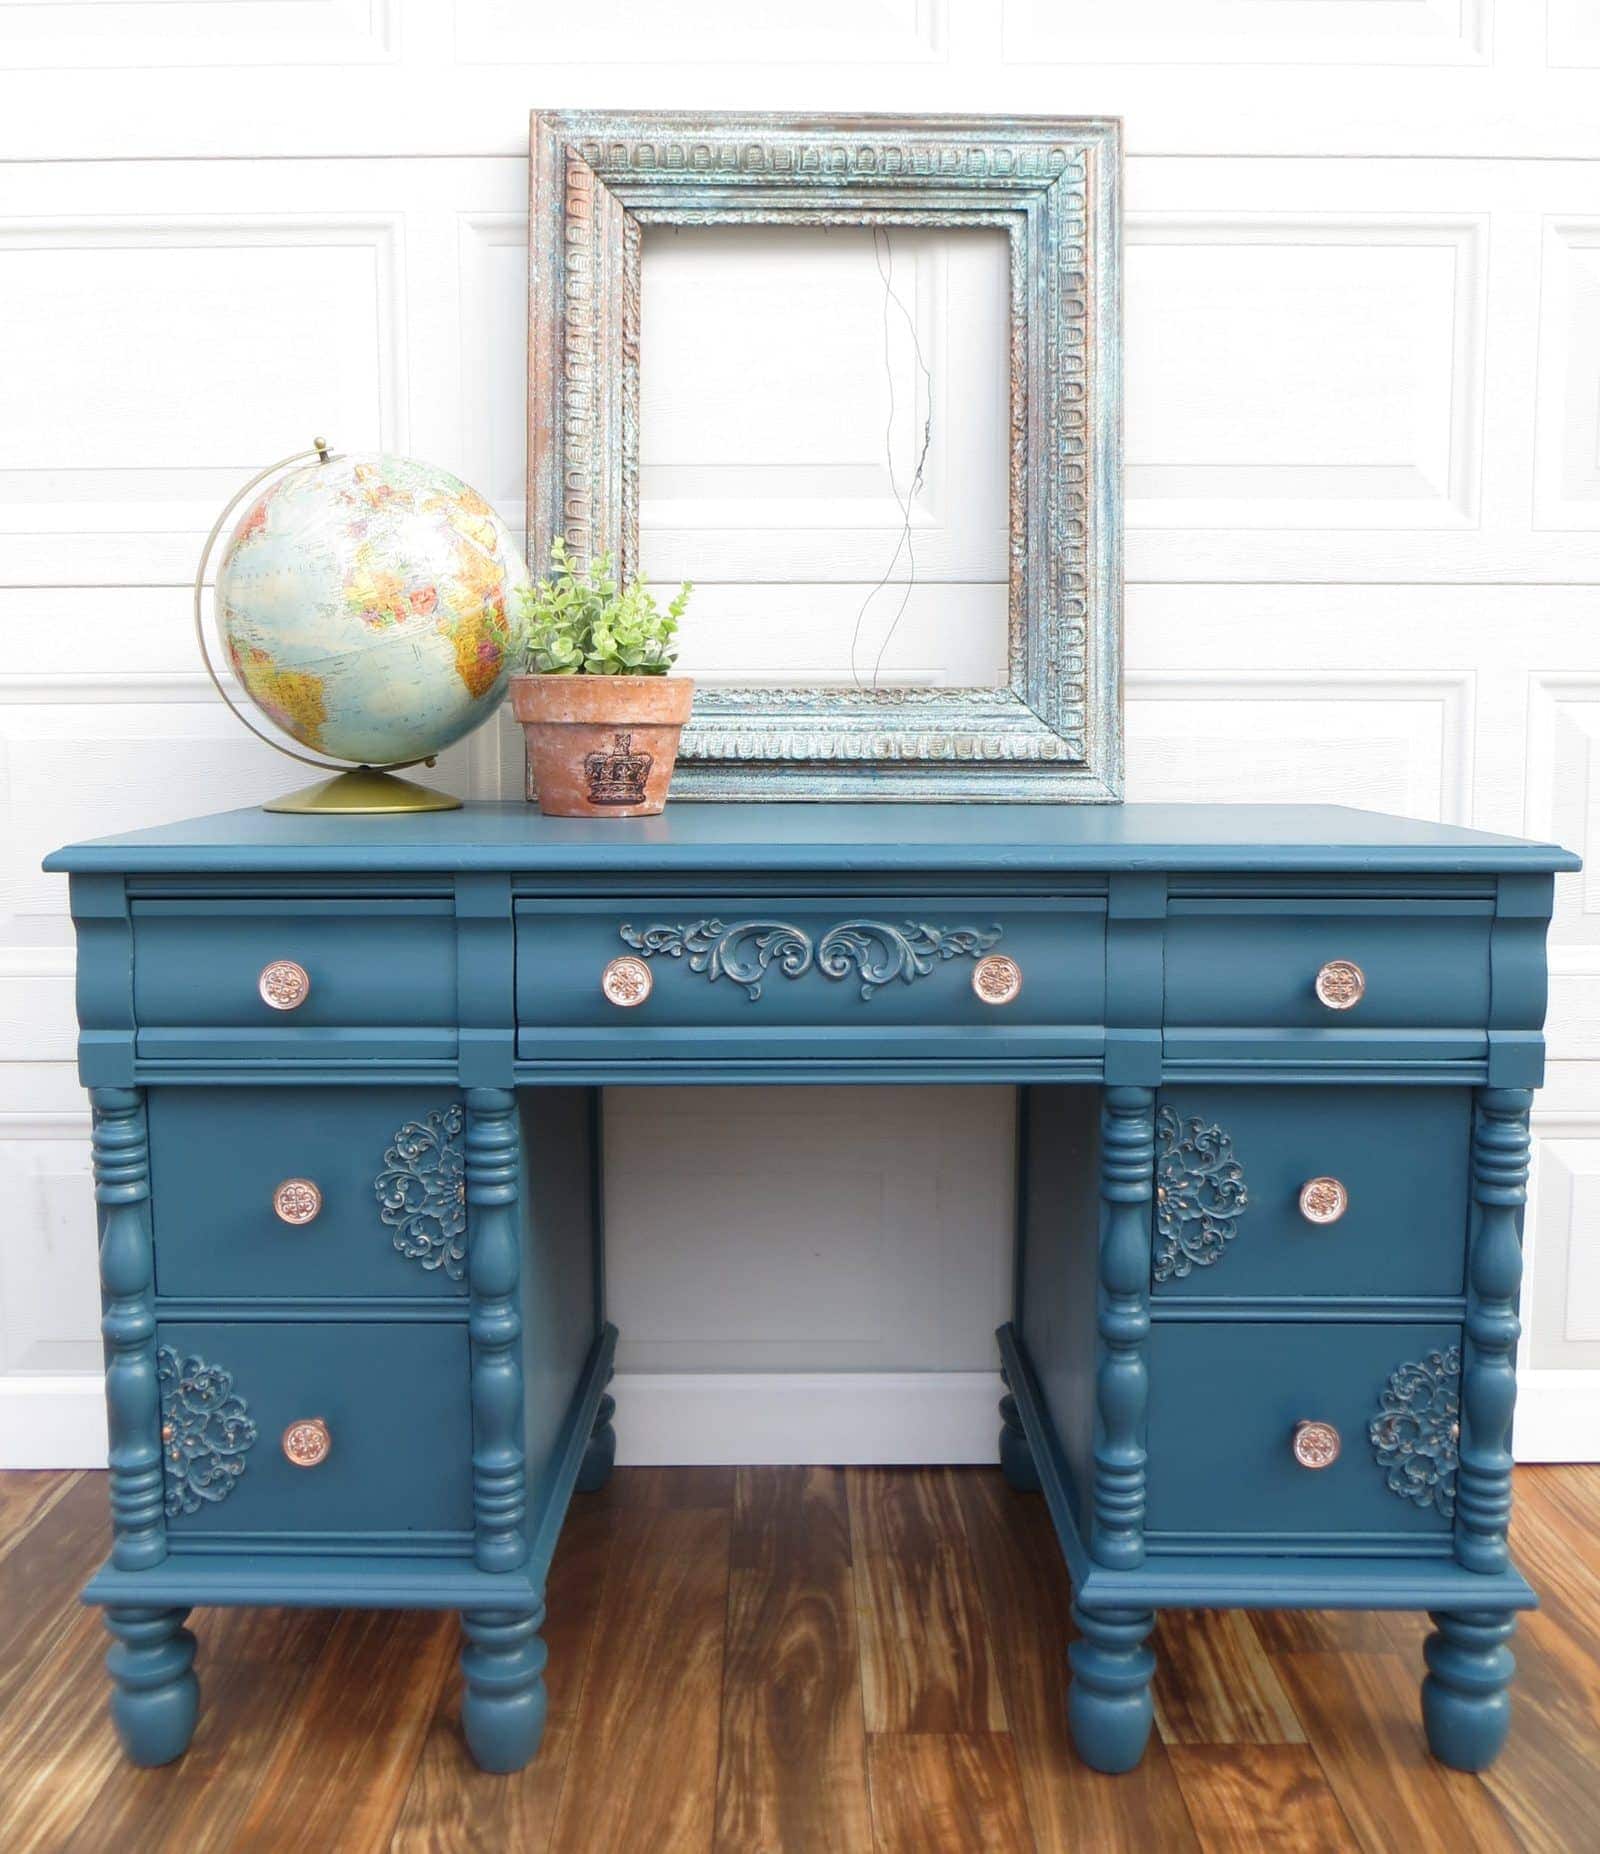
Here’s a desk makeover to stoke your creativity, and inspire you to transform your own furniture and décor.
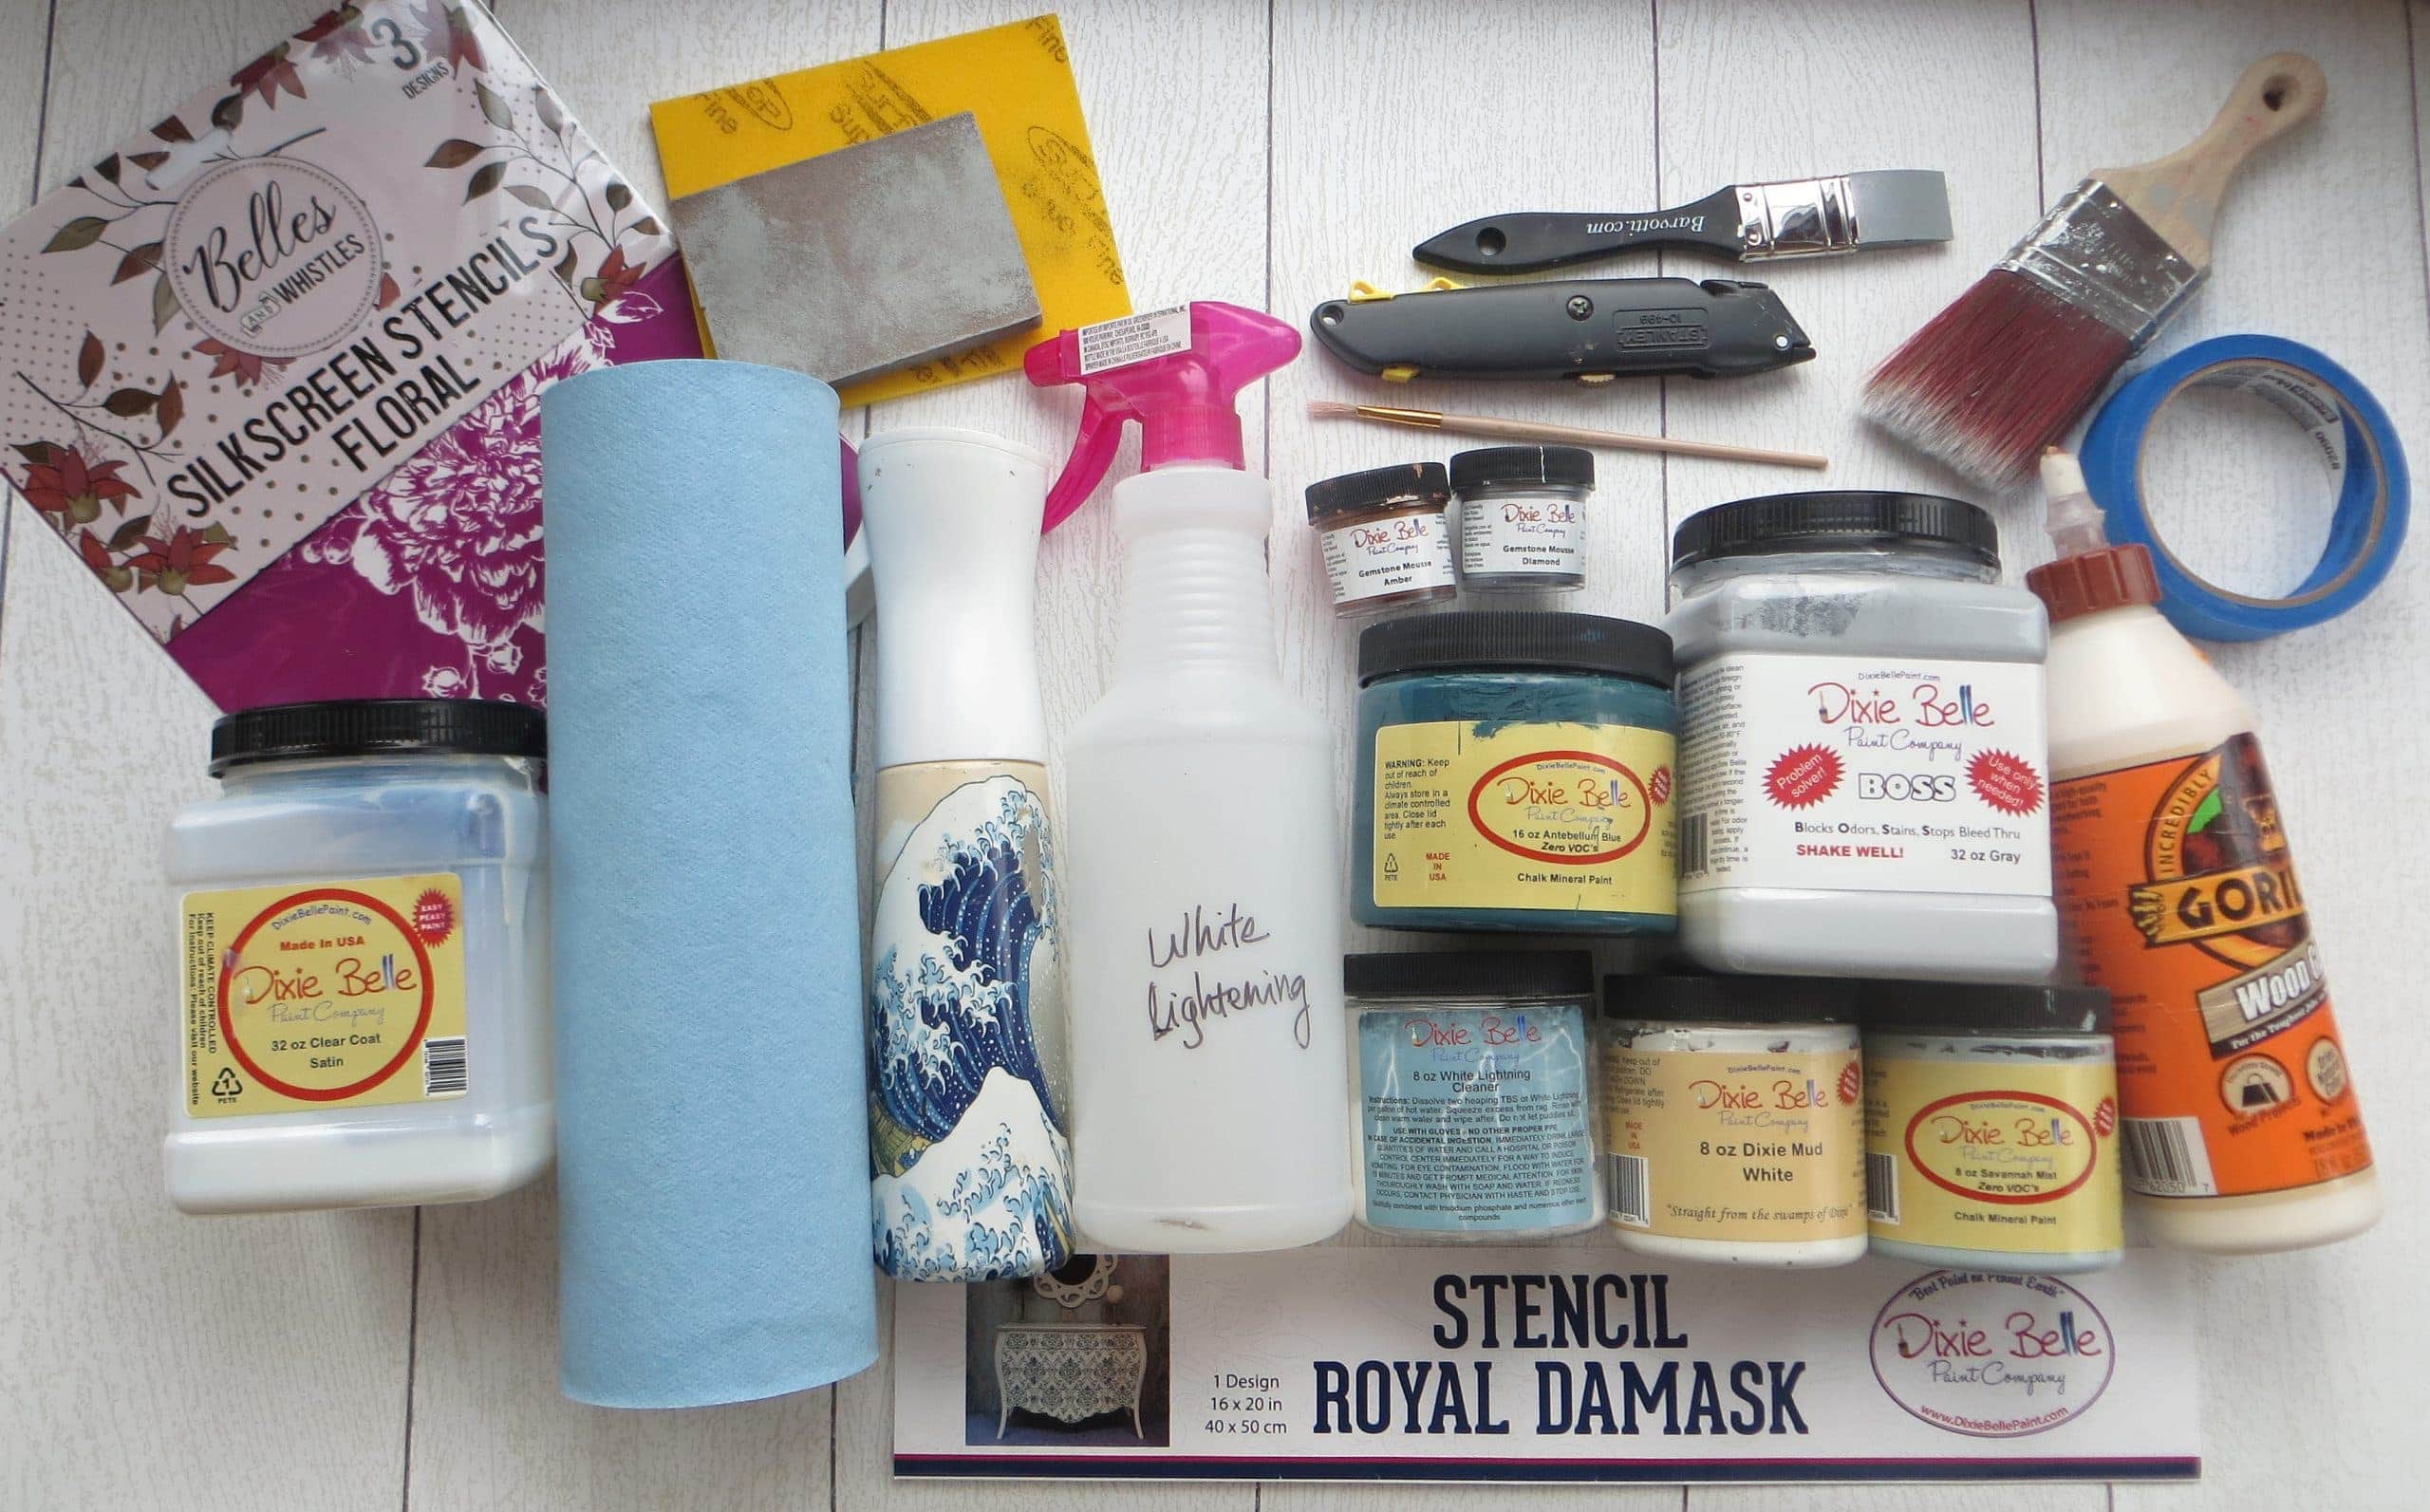
List of Materials
- Desk (thrifted)
- White Lightning granulated cleaner
- B.O.S.S. (stands for Blocks Odors Stops Stains and Bleed-through) in Gray
- Dixie Belle Chalk Mineral Paint in Antebellum Blue
- Dixie Belle Dixie Mud in White
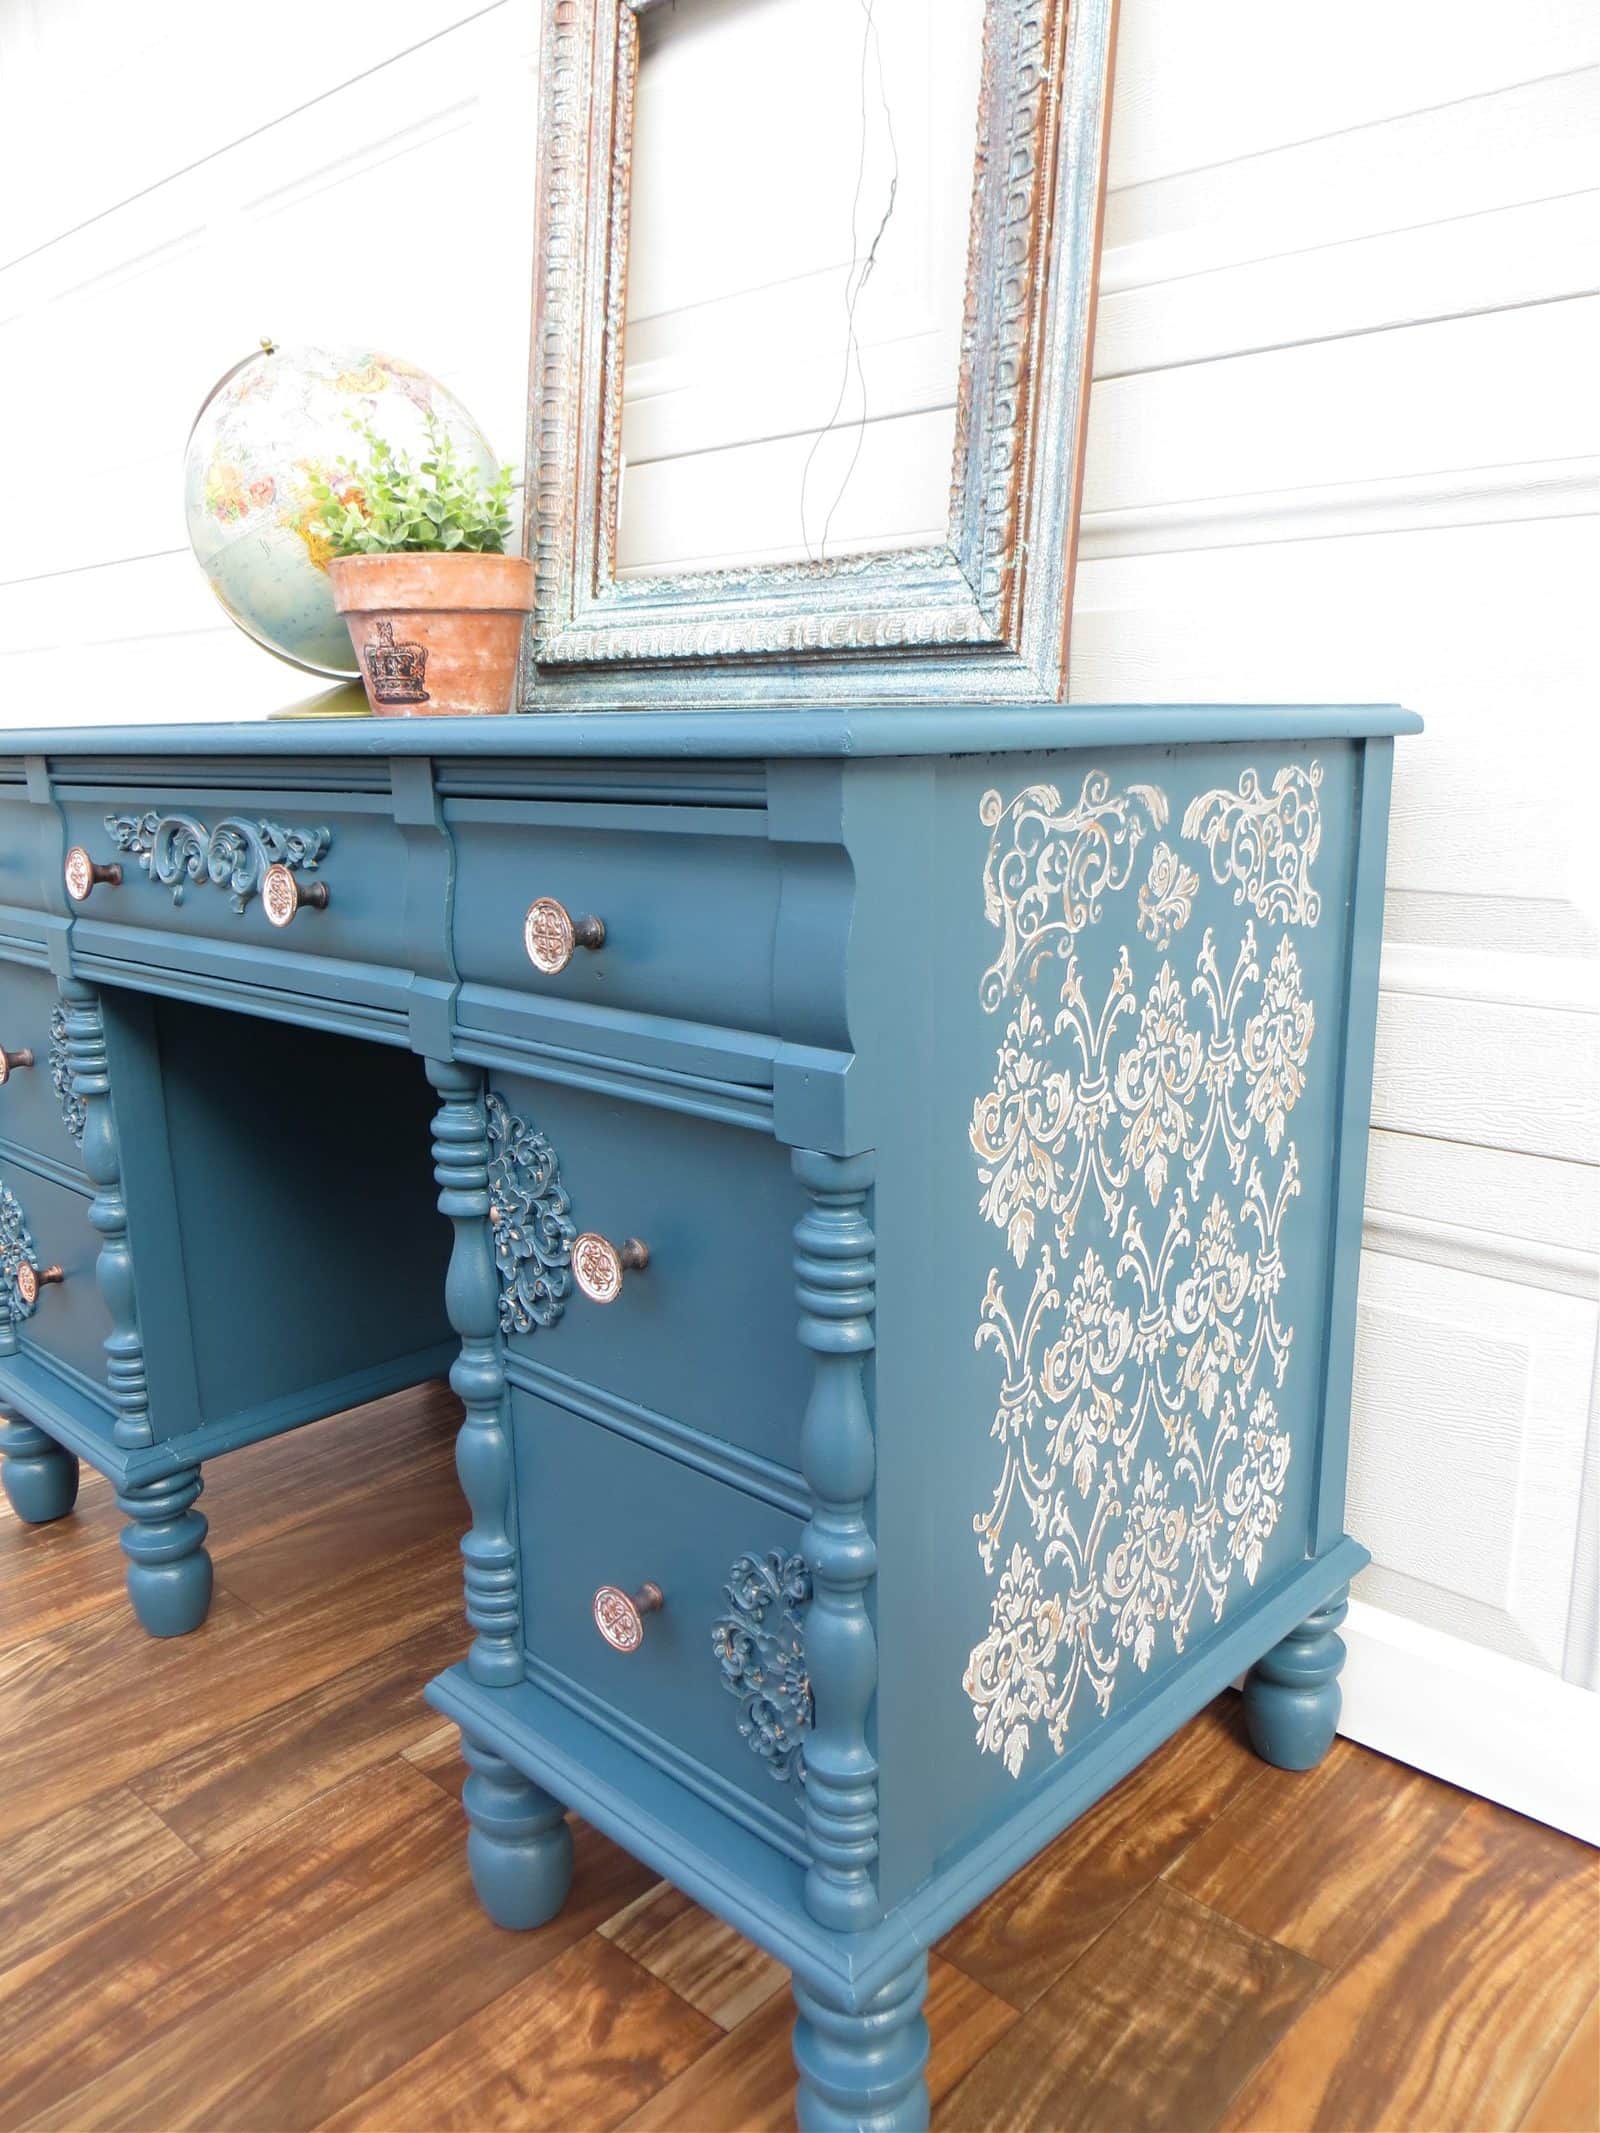
- Dixie Belle Damask Mylar Stencil
- Parts of Dixie Belle Floral Silkscreen stencil
- Dixie Belle Gemstone Mousses in Amber & Diamond
- Dixie Belle Chalk Mineral Paint in Savannah Mist
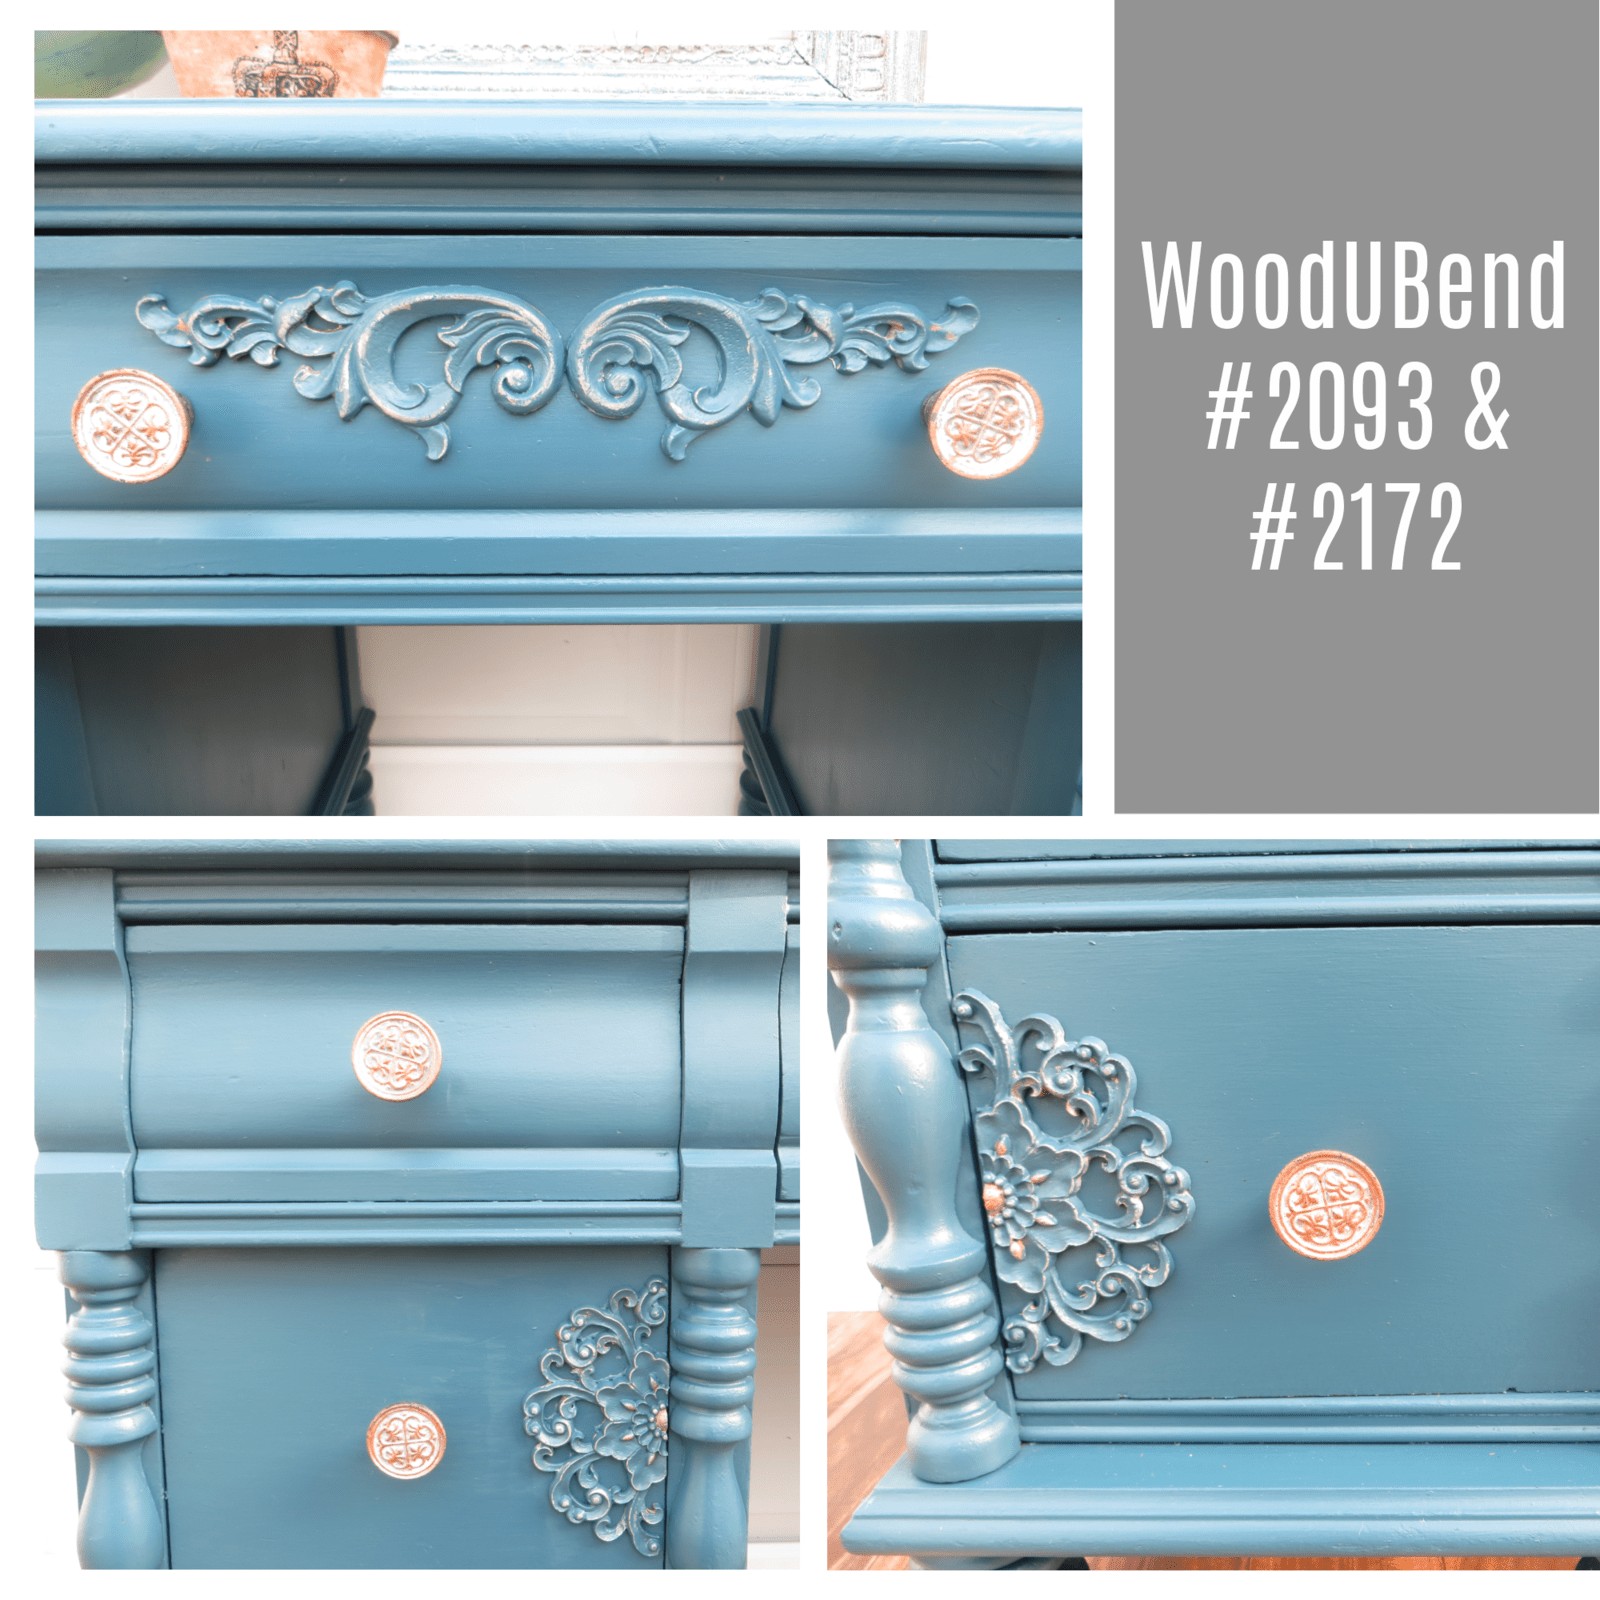
- WoodUBend appliques #2093 and #2172
- Dixie Belle Clear Coat in Satin
- Knobs (Hobby Lobby)
List of Tools
- Shop towels
- Painter’s tape
- Silicone spatula tool
- Sandpaper: 220-grit and 400-grit
- Gorilla Wood Glue
- Hairdryer
- Razor blade
- Paint brush (preferably synthetic)
- Small artist paint brush
- Fine mist sprayer
CLEAN & SAND
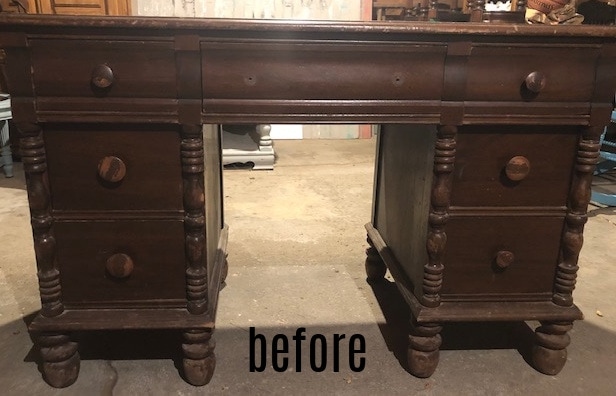
Clean the desk using a TSP-based cleaner like White Lightning. I like to mix the granules with warm water in a spray bottle.
Spray the desk liberally and wipe it down with shop towels. Follow up with clean water to rinse, and dry with more shop towels.
Lightly scuff sand with 220-grit to smooth the surface and wipe down to remove sanding dust.
PRIME
Paint with 2 coats of gray B.O.S.S., allowing it to dry a minimum of 1 hour between coats.
PAINT
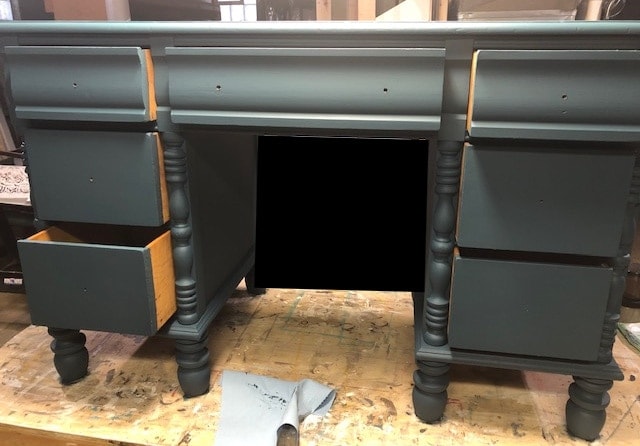
After B.O.S.S. has dried overnight, paint 2 coats of Antebellum Blue allowing it to dry a minimum of 1 hour between coats.
I like to use the fine mist sprayer to thin the second coat and make it super smooth. Dixie Belle paint is self-leveling and the water helps it level even better.
EMBELLISH
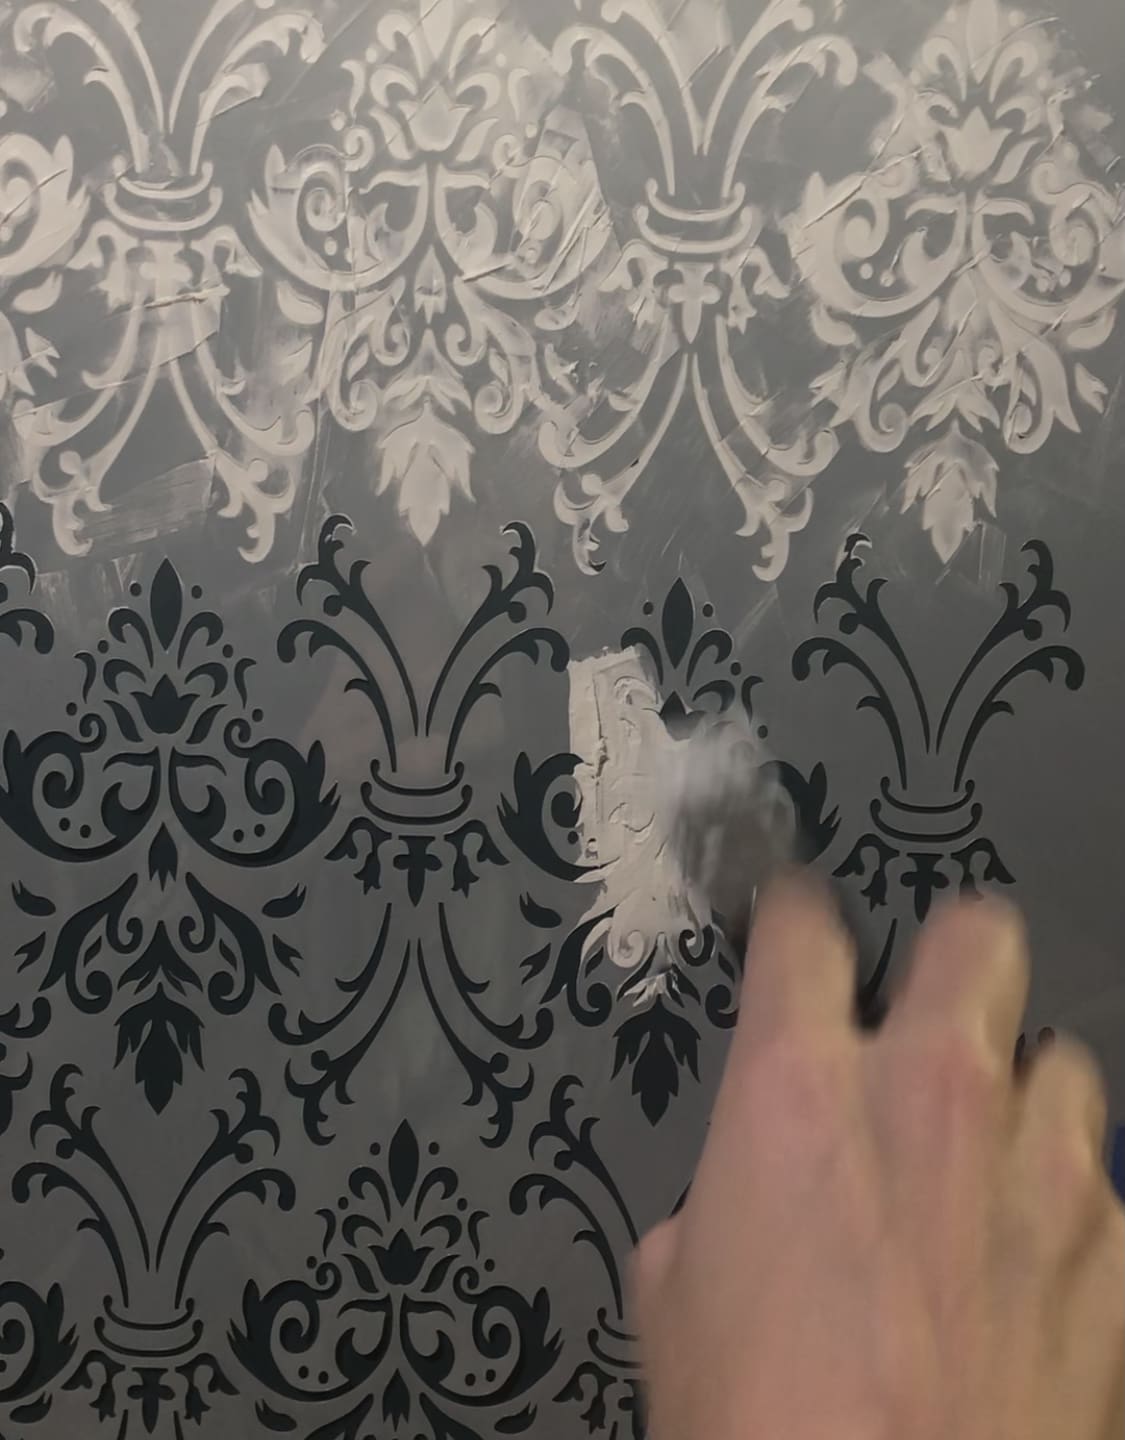
Embellishment time! Center the Damask mylar stencil on the side of the chalk painted desk. Affix the stencil to the desk with painter’s tape. Stir the Dixie mud to ensure a smooth consistency.
Using the silicone spatula tool, dip into the mud and spread it evenly over the stencil. Scrape the excess back into the jar.
Carefully lift the stencil off without disturbing the mud. Allow the mud to dry thoroughly.
Cut out the sections to be used from the Floral Silkscreen stencil. These are self-adhesive, so peel of the white backing and stick into place on the desk.
Again add the mud using your spatula and carefully remove the stencil. Allow mud to dry thoroughly.
PAINT RAISED STENCIL

Hand paint the white mud raised stencil areas using the Diamond and Amber Gemstone Mousses and the small artist brush. I mixed the 2 colors together to create a third rose-gold color as well.
Use the colors randomly over the raised stencil area. To add dimension, paint some areas of the raised stencil with Savannah Mist. Allow to dry.
Using 400-grit sandpaper, sand over the raised stencil. This will reveal some of the white mud around the edges of the design, and also smooth any rough spots. Use an old paint brush or vacuum to remove the sanding dust.
PREPARE WOODUBEND
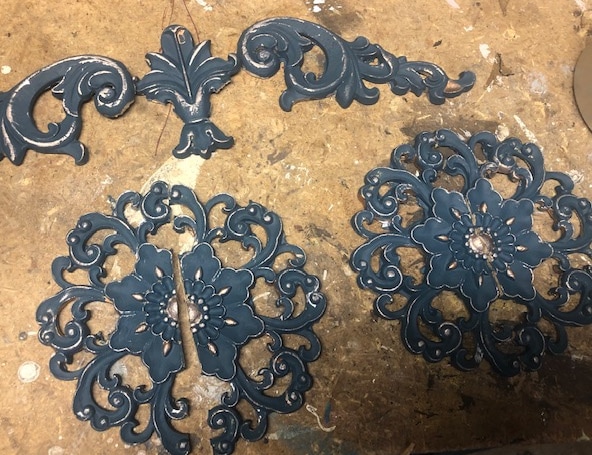
Using a razor blade, cut the WoodUBend appliques. #2093 should be cut to remove the fleur-de-lis in the middle. The 2 sides will be adhered to the middle drawer.
The two #2172 appliques should be cut down the middle. These will be adhered to the other drawer fronts.
Paint the appliques front and back with Antebellum Blue. Once dry, dry brush the Gemstone Mousses over the raised areas.
ADHERE WOODUBEND
To adhere the appliques, first heat a piece with a hair dryer. You will be able to feel when it becomes soft and bendy. Cover the back with a layer of Gorilla Glue.
Stick it down where you want to adhere it and heat it again with the hair dryer. Push it down well as you heat. Once it cools for a minute or so, it is good to go. No tape or clamps required.
SEAL
Seal the whole surface, including the raised stencil areas, with Satin Clear Coat. Apply two coats with a brush, allowing it to dry for an hour in between.
INSTALL KNOBS
Install the knobs.
ENJOY!
Notes:
If you don’t have the silicone tool, you can use a putty knife or an old credit card to push the Dixie Mud into the stencil.
Don’t rinse the mud on your spatula or stencil down your drain. Clean with wipes or paper towel before rinsing. Also, refrigerate the mud after opening to keep it fresh.
Clean your silkscreen stencil as soon as possible after use. These can be re-used 5-8 times each.
When hand painting the raised stencil areas, don’t worry about perfection. You can always touch up any big mistakes with Antebellum blue, and small mistakes will be obscured when sanded.
Save the fleur-de-lis portion of the WoodUBend applique for a different project.
To spread the Gorilla Glue on the applique, use an old child-sized paint brush. Note, WoodUBend appliques require WOOD glue, so don’t use E6000, hot glue or anything else that isn’t wood glue.
Conclusion
By switching out the paint colors, stencils and appliques, imagine all the different looks you can achieve with these techniques.
You can take your old family furniture or thrifted finds and give them an inexpensive update to fit into your home’s colors and décor.