How to Antique Furniture – DIY Antiquing Furniture
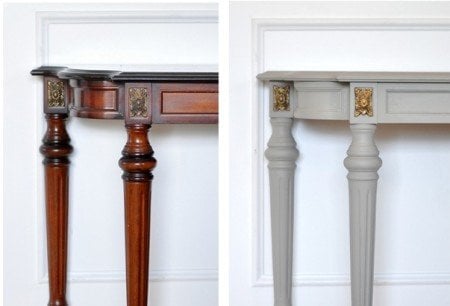
Creating your own antique furniture sounds a little pretentious, but find antique reproduction furniture with good bones and you can age and embellish it to fit your own home decorating style. And it will look a million bucks! Antique furniture is wonderful but not in everyone’s budget. Which means, it could be time to do the next best thing..
Source: All Things Beautiful
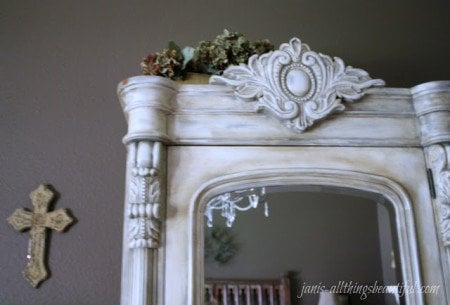
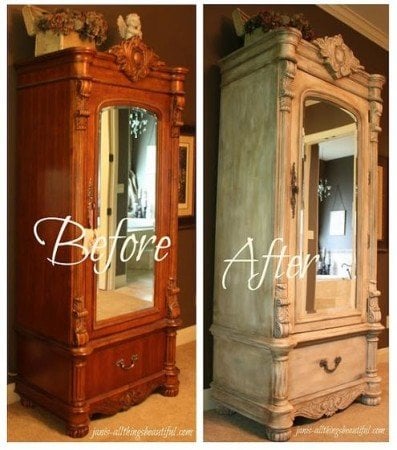
Fake It! One dramatic antique reproduction piece is all you need to set the mood and inspire you entire decorating style. A piece that makes a statement, grounds the room and has the structure and bones to be reborn as an antique!The armoire above is a good reproduction with great carving that make it perfect for painting in layers.
Here is another example of a piece of hand crafted antique reproduction furniture born in the 1950’s and reborn with some aging and waxing. But you don’t have to use a older piece, chalk paint or milk paints to get antique looking furniture. Keep reading for different antiquing furniture techniques.
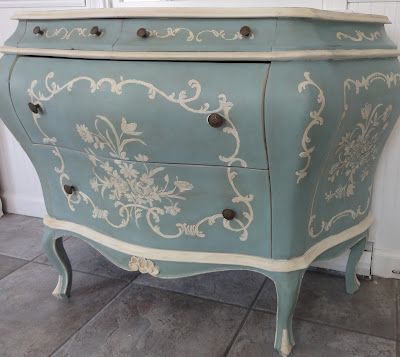
This beautiful hand crafted French dresser was bright yellow. Made in the traditional style of the Venetian and Tuscan masters with gold leaf, this is a perfect example of a well crafted, solid piece with great lines. The 1950s French dresser looks expensive 1800s French antique.
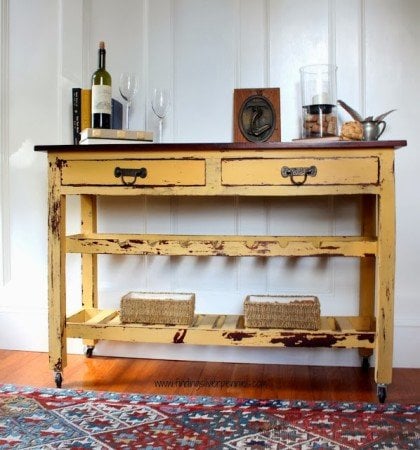
Source: Finding Silver Pennies
For an aged, distressed look, this piece from Finding Silver Pennies used Miss Mustard Seeds Milk Paint.
How to Antique Paint Furniture?
There are a lot of different painting and aging techniques you can use. While antiquing and distressing both create an aged look, sometimes used together, they are different painting techniques.
Source: Bob Vila
When antiquing furniture, you add layers of paint and stain. When you distress furniture, you remove the finish to look like natural wear and tear. Here’s a video on milk paint distressing to help you decide on the look you want.
What Styles of Furniture is Good for Antiquing?
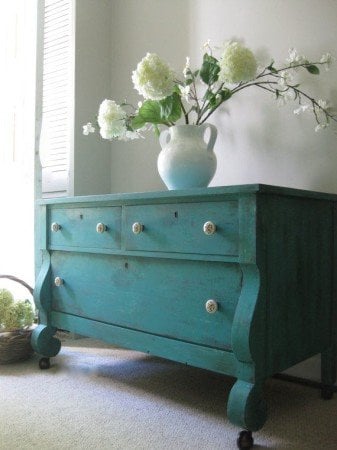
You want pieces with detailing that give a piece character. Pieces that work well are Empire, American Farmhouse, and French Provincial styles. Make sure they are solid with details such as serpentine drawers, beading, and turned legs.
Source: Empire from Pinterest
It doesn’t have to be French or even antique reproduction furniture – you might find something hand crafted, vintage, English, American or Italian worth a makeover. Find a piece of antique reproduction furniture that makes you happy! But if finding a piece with character fails – create your own.
How to Antique Furniture with Paint?
One way to DIY antique furniture is using this method on a small piece from Ikea. You can find the full tutorial at HGTV. Using chalk paint or milk paint can be faster because there is no need to put a primer first – saving you at least one step.
Source: HGTV
You will need:
- unfinished piece of furniture (for this method)
- oil-based primer
- 2 colors of satin-finish paint
- dark brown paint
- glaze
- paintbrush
- small foam roller
- stencil
- rag
- cheesecloth
- polyurethane
Antiquing Furniture with Paint
1. Paint your unfinished furniture piece with an oil-based primer and allow to dry.
2. Apply the base coat, using stain finish paint and a brush, for an aged look. Using flat or matte paint can make the glaze look blotchy. Allow to dry.
3. Fix your stencil on the piece and paint over it with your second paint color. Use a damp rag to wipe away paint. Delicately remove the stencil.
4. Mix your antique paint glaze by stirring thoroughly one part dark brown paint to three parts glaze. Brush the glaze generously over your piece. To avoid drying lines, glaze in sections. Wipe glaze off immediately with a rag or cheesecloth. Cheesecloth delivers a smoother finish. A rag gives you a wiping effect. Continue applying and removing glaze until you achieve your desired look. Remove any excess with a damp rag. It should come off easily.
5. To highlight architectural features, brush your glaze into corners and crevices of features, doors, drawer fronts. Wipe off excess.
6. For the edges; run your brush, with a small amount of glaze on the tip, along all edges at a 45-degree angle to create a line of glaze.
7. Once dried, protect your piece with a coat of polyurethane.
How to Antique Furniture Using Chalk Paint?
Chalk paint is one of the fastest and easiest ways to creating a DIY antique furniture look. It’s easy to use, easy to buy and even make your own, including your own colors by adding chalk paint powders to latex paints. The best thing is you don’t have to sand your piece, just paint right over it and then wax. Age your piece using waxes, with or without distressing it first. That becomes a personal choice and the type of antique look you want.
Source: All Things Beautiful
How to Paint with Chalk Paint?
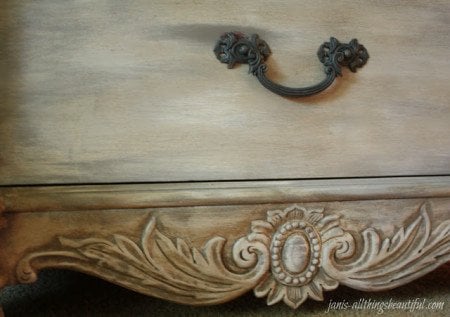
Chalk paint is easy to use. Here are videos to use chalk paint which needs no prepping or stripping before painting. Time can be spent on getting the aged antique look you want. Here is another way of waxing your piece. Instead of using clear wax first, then dark, mix the clear and dark wax together. Which means you save a step! This armoire, from All Things Beautiful has 3 spoons of clear wax, 2 spoons of dark wax, then about 1 tablespoon of ASCP French Linen paint. Chalk painted furniture is resilient and hardwearing.
Even though a little goes a long way, and chalk paint will save a lot of time, it can be more expensive than using latex paint, which you should factor in if you piece is large. Here is a tutorial from Addicted To Decorating using latex paints; you will also need a coat of primer, followed by a coat of spray paint, stain and followed by one or two coats of clear sealer.
The video below uses Annie Sloan Chalk Paint, plus clear and dark wax to age the piece. You don’t need a lot of dark wax left on your piece to create an aged look, just enough to give a worn look. The piece looks beautifully aged at the end. If you are new to chalk paint and milk paint, read this article on the differences here.
How to Antique Furniture with Paint and Stain?
If you piece is a light wood color and you want a similar rich wood look, as the video above, use antiquing furniture stain first on your piece. Allow to dry before you paint your piece. Distress lightly on the edges for the warm wood colors to peek through. Be careful not to distress too much as the original light wood color will come through. Once you have distressed your piece, wax with clear and dark wax to age it.
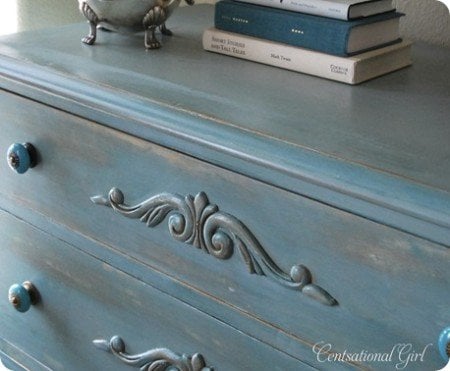
This blue dresser from Centsational Girl uses paint, dry brushing and a water based sealer to give this dresser new life. Dry brushing means wiping most of your paint off your brush before apply it, to get a deliberate two-tone look and reveals the base color underneath. What makes this piece stand out is the new hardware and embellishments which are new to this piece, but make all the difference.
Source: Censtsational Girl
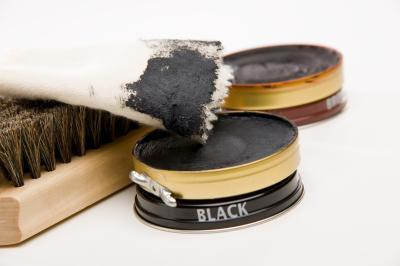
Antiquing Furniture With Shoe Polish? Seriously?
Source: SF Gate
Paint and stain aren’t the only ways to antiquing furniture. Shoe polish is a great way to create an antique look and used by many antique dealers to age furniture.
Practice using paintbrushes, sponges and cheesecloth, to get the look you want before using it on your furniture.
- Apply a thin layer of shoe polish on the areas you want to antique with a paintbrush (straight line) or rag (mottled).
- Apply shoe polish to cabinet legs, edges or raised surfaces where dirt might accumulate.
- Remove excess polish with a rag or paper towel. Leave some areas darker than others for a more natural aged look.
- Apply two coats of an acrylic varnish, once the shoe polish thoroughly dries and hardens.
This may not give you the wonderful luster that specifically made waxes will produce but if you are on a budget or practicing with painting furniture, this could work perfectly.
How to Antique Furniture with Glaze
Source: Sweet Pickins Furniture
Once you have painted and distressed your piece, it’s time to glaze.
Valspar (Lowes) translucent mixing glaze and walnut stain was used on this cedar blanket chest but you can use any stain or paint mixed in a 3:1 ratio (3 parts mixing glaze to 1 part stain). Glaze helps you to work longer. If you paint/stain furniture, you don’t get a lot of time to work with it before it dries. Apply it all over. Get into all the little cracks and imperfections which will add character to your piece when finished.
Now its time to wipe the piece down, removing as much glaze as you want. You can also add more glaze if you have removed too much. The full tutorial is here.
Antiquing Furniture
When you antique furniture, you are creating a new fictional story; rewriting its history. To look original consider how it might have been used and worn over the decades. Distress the high points that would have received the most wear and tear and antique the low points or crevices where dust would have settled.
Source: Centsational Girl
Antique Furniture Paints
Milk paint and chalk paint, along with small bottles of craft store acrylic paints for decorative detailing are enough to antique your furniture. These new paints are more natural. They soak in like stain but look like paint and dry a wonderful matte that can be waxed to age the piece. You can also use latex paints to get similar looks but most people prefer to use milk paint or chalk paint.
Here is a milk paint recipe from Martha Stewart to make your own milk paint or see what you can buy here.
The Layered Look
Source: Paris Pefect
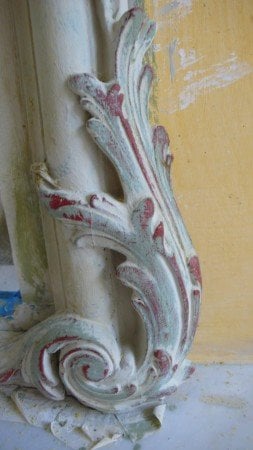
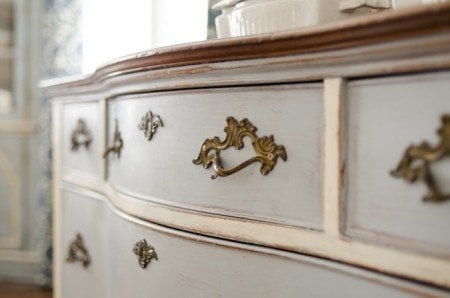
To re-create beautiful antique furniture that has been repainted over the years, layer your paint colors, sanding with medium and fine sandpaper so the base paint colors can peek through and adding to the patina.
Finish with Antique Waxes
You can use a variety of oils and waxes to get your desired antiquing look including, white wax for liming, furniture wax for a butter-soft texture and dark wax for antiquing.
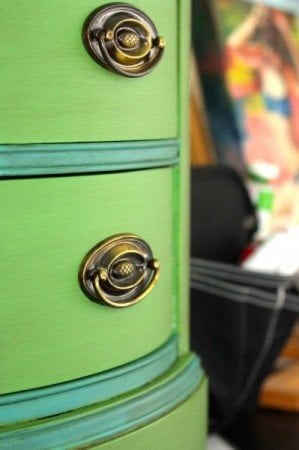
You can find 7 painted furniture techniques and trends here and green painted furniture ideas here.
![bench and hall tree 010_thumb[2]](https://decoratedlife.com/wp-content/uploads/2012/07/bench-and-hall-tree-010_thumb2-305x450.jpg)
